|
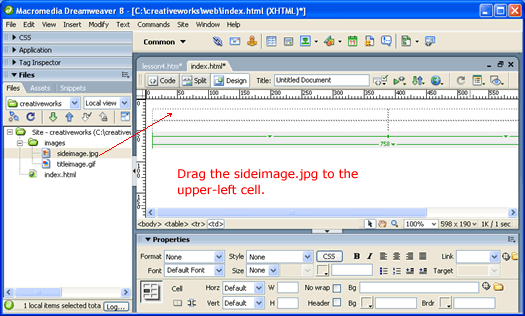
Adding Our ImageSwitch back to the Design view. To put our sideimage.jpg as the content of the northwest cell, simply drag it from the Files panel to the cell as shown.
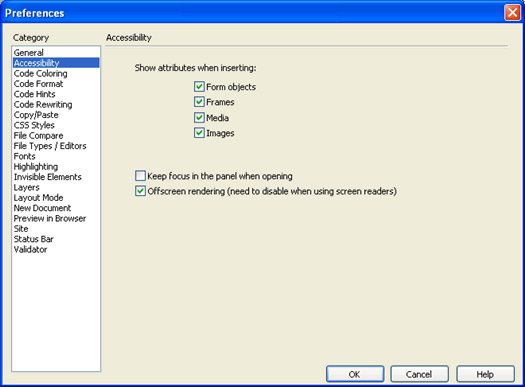
You might get the Accessibility Attribute dialog ...
We won't worry about this now. So click Cancel. I say that you might, because you will see this dialog whenever you place an image if your Edit -> Preferences are set as shown...
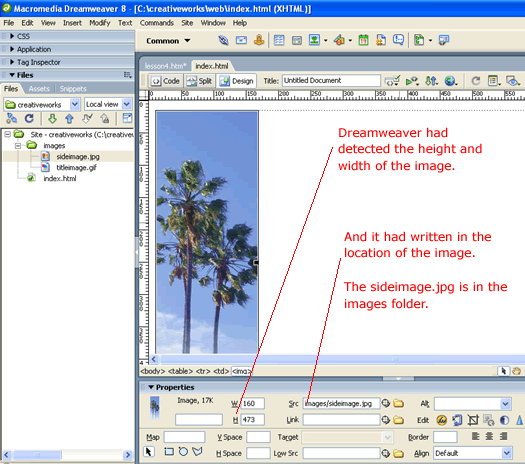
And in Dreamweaver 8 (but not in Dreamweaver MX), these are the default settings. Although we had dimissed Accessibility Attribute dialog this first time, we will be using it next time. So check your preference settings now and make sure that you have them set as shown above. After dragging the image to the cell and selecting the image, you see the image's height and width already specified in the Properties window ...
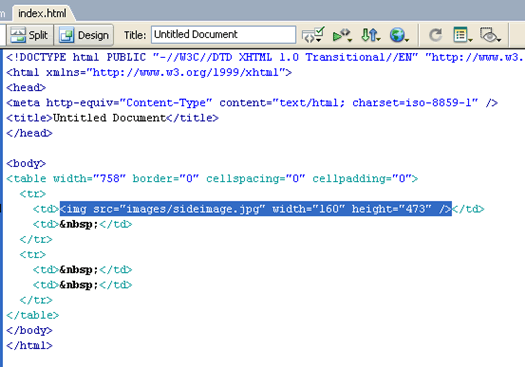
While the image is still selected, switch to the code view. You will see that the code for the image is already highlighted by Dreamweaver ...
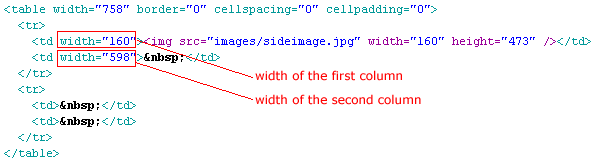
The image code (represented by the <img> tag) had replaced the non-breaking space in the <td> cell. Note that the image tag is said to "have no body" and that the start tag and end tag are merged into one tag as <img /> Of course, the <img> tag has attributes. The src (stands for "source") attribute tells the browser where to get the image relative to the current html file. Since our image in within the images folder, the relative path of our image is images/sideimage.jpg The <img> tag also specifies the width and height attribute. Although these attributes can be omitted since the browser can figure out the height and width of the image. It is good practice to always specify explicitly the height and width in the <img> tag. This way, the browser can easily know amount of space to allocate in page layout without having to wait for the image to download. Specifying Column WidthWe want the width of the first column to be exactly as wide as the side image (which is 160px). So we specify the width of the first column by adding the width attribute to the first <td> cell in the first row as shown.
Similarly, we specify the width of the second column in the second <td>. Download: code4.zip In the next lesson, we will add our second title image.
|
 |
 |
| Roadmap | Lessons | Tutorials | Videos | Books | Links | About |
|
|